Control screen
The Control screen is the hub: readouts, machine state, manual controls, the New test runner and live charts, all updating while you're connected.
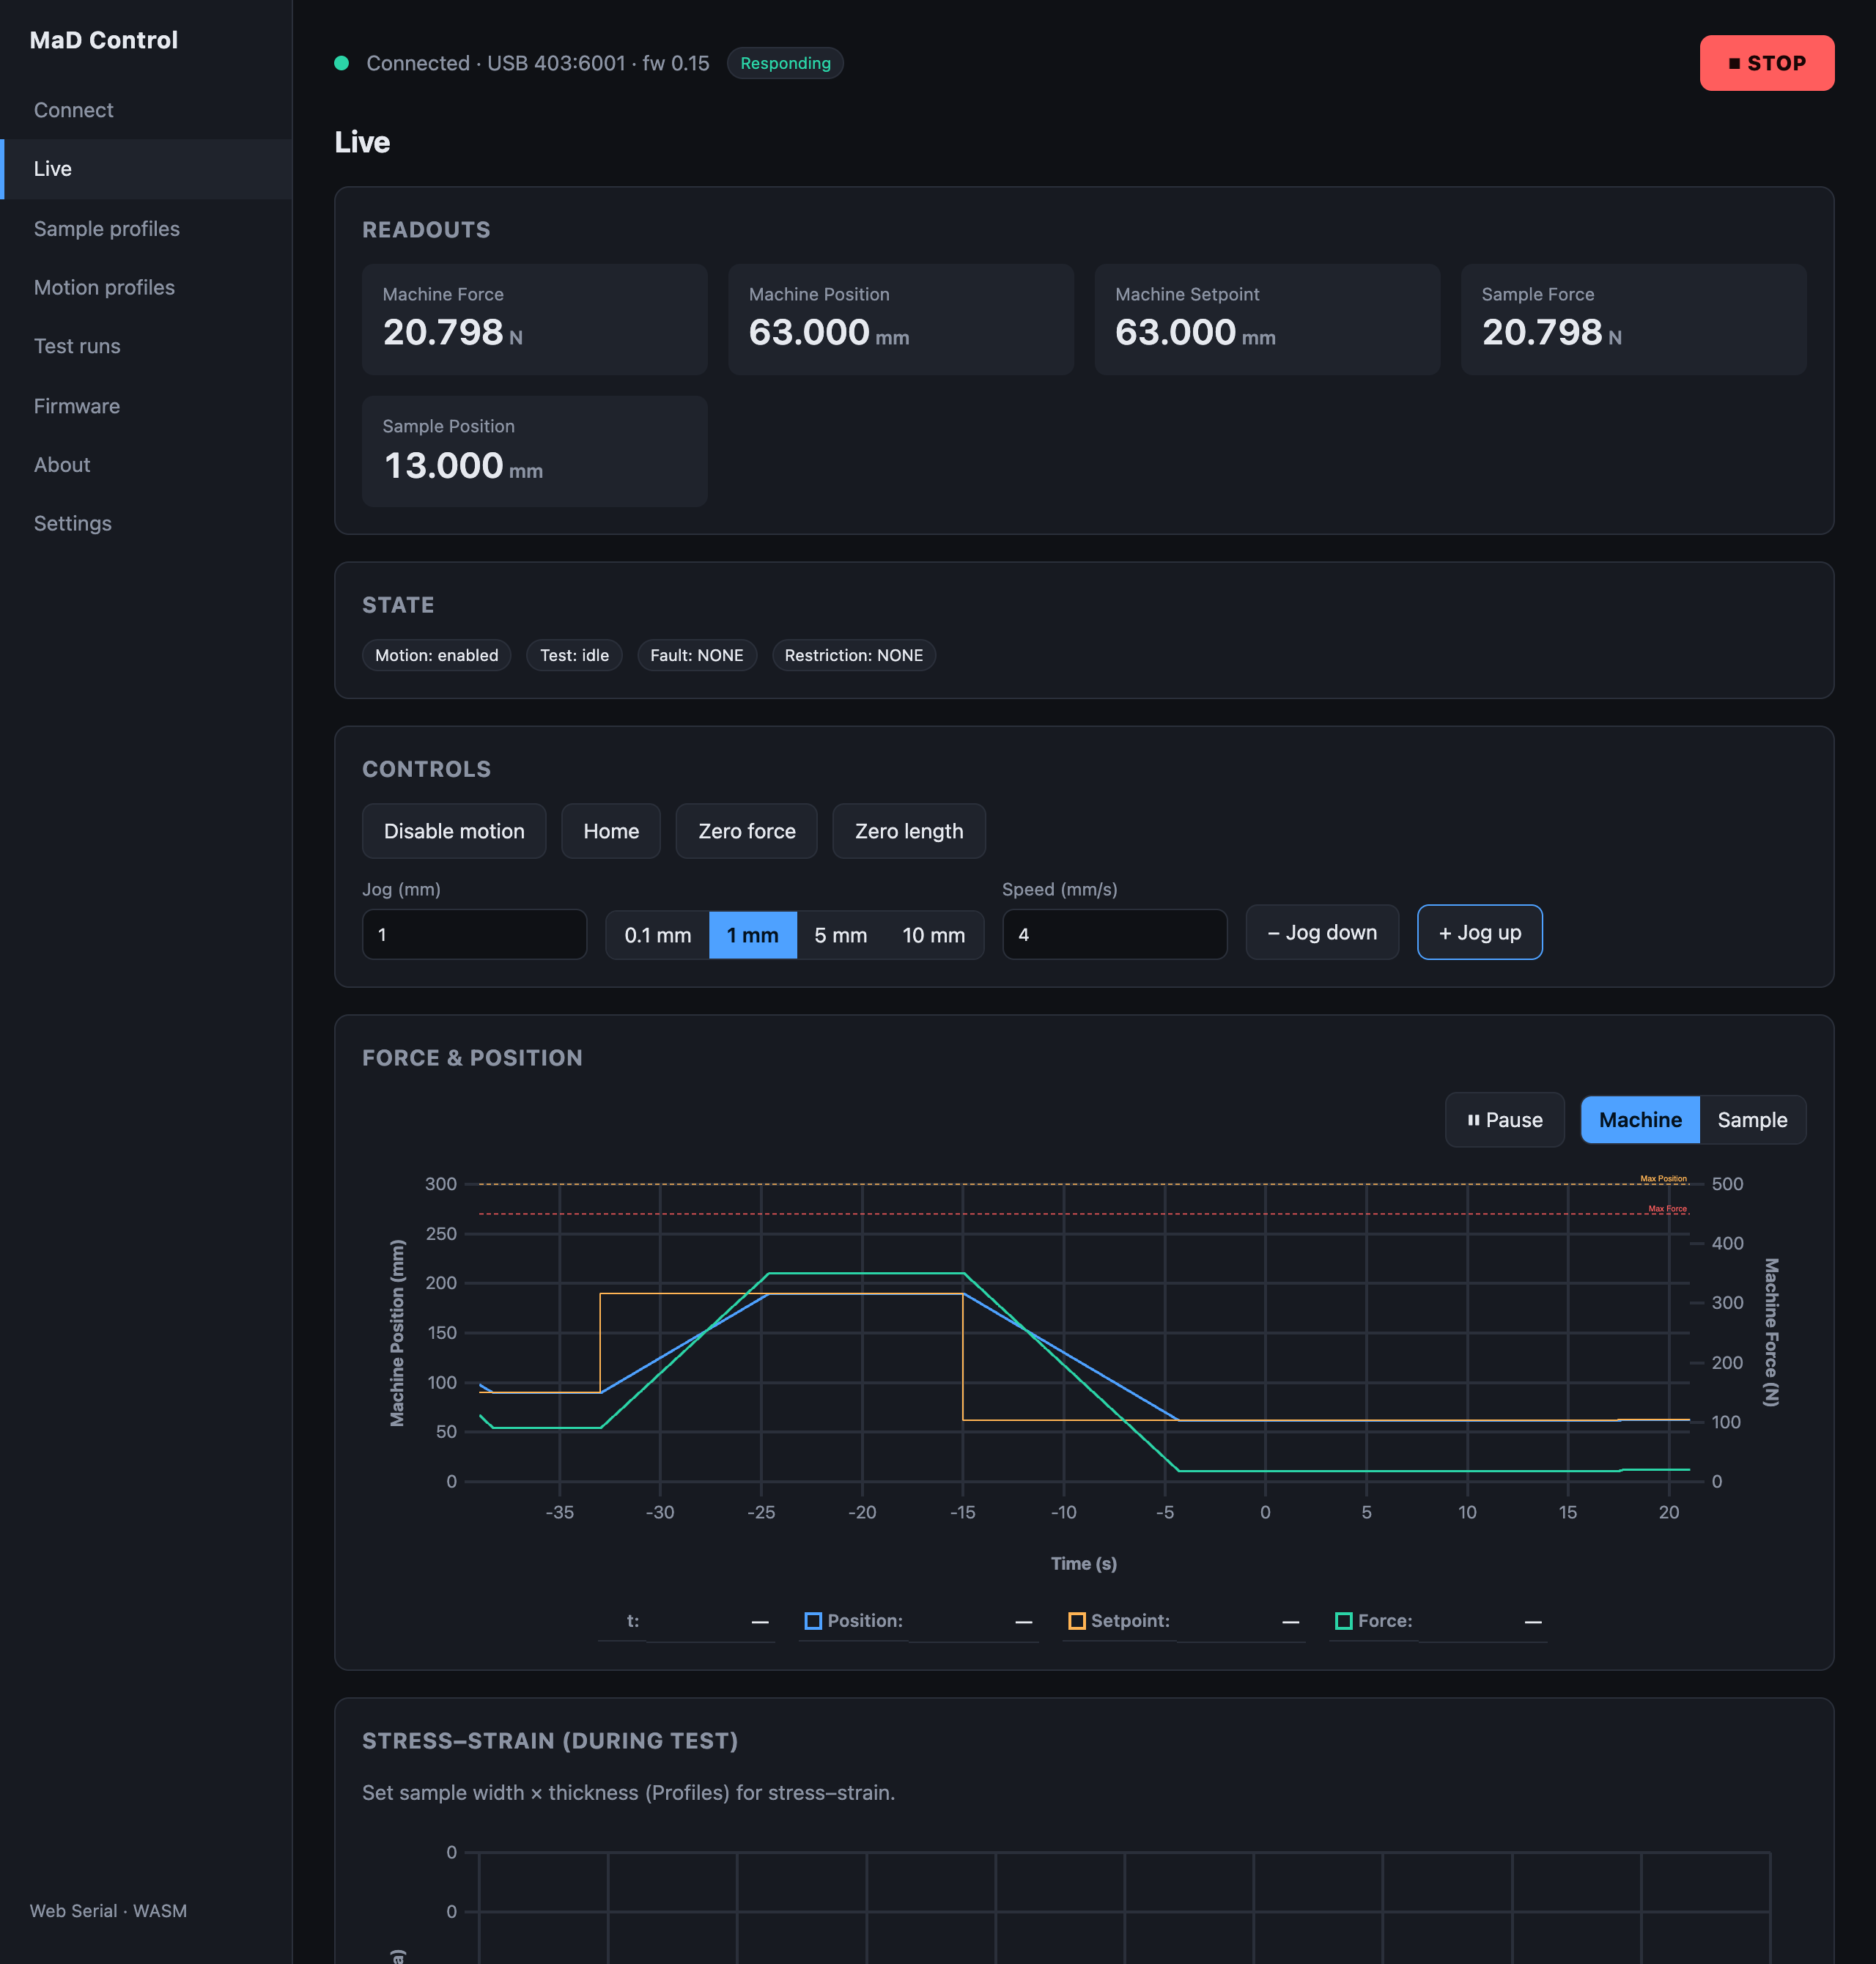
Readouts

| Readout | Meaning |
|---|---|
| Machine Force | The absolute force at the load cell |
| Machine Position | Jaw separation, from the encoder |
| Machine Setpoint | Where the motion trajectory says the gantry should be right now, acceleration included. Machine Position follows it, and a test run records it as the setpoint. |
| Machine Target | Where the current move ends. It changes in one step when a move starts. |
| Sample Force | Force since Zero force |
| Sample Position | Extension since Zero length |
Forces are in N, positions in mm. The numbers refresh four times a second so they stay readable; the charts draw every sample. Hover a readout for its description.
State
A coloured status banner says what the machine is doing and what to do next:
| Banner | Colour | Next step |
|---|---|---|
| Ready | Green | Motion is on. Jog, home, or start a test. |
| Motion is off | Amber | Press Enable motion to jog or home. |
| Restricted: the reason | Amber | The restriction's remedy. The gantry moves at reduced speed until it clears. |
| Faulted: the reason | Red | The fault's remedy. Motion stays off until the fault clears. |
| Test running | Blue | Manual controls are locked. Use STOP to halt. |
| Waiting for the machine | Grey | Controls unlock once the machine reports its state. |
Below it, four badges show the state in detail:

| Badge | Values |
|---|---|
| Motion | enabled or disabled: whether the machine will act on a move |
| Test | running or idle |
| Fault | NONE, or the reason motion is switched off. Turns red. See Faults. |
| Restriction | NONE, or a condition limiting motion. See Restrictions. |
Hover a fault or restriction badge for a one-line explanation. While a fault or restriction is showing, the banner gives the same explanation.
A badge showing — means the machine has not reported its state yet. The controls stay locked until it does:

How these badges relate to the machine's internal state (DISABLED, RESTRICTED, MANUAL, TEST) is in the theory of operation.
Force & Position chart

A 60-second rolling chart of Position, Setpoint and Expected (left axis) and Force (right axis).
- Setpoint is the machine's trajectory, acceleration included.
- Expected (dashed) is the ideal path a jog or test asks for: a straight line at exactly the commanded speed, with no acceleration. The gap between Expected, Setpoint and Position shows how closely the machine follows the commands.
- Machine / Sample switches between absolute values and values since zeroing. Sample shows position and force only.
- The dashed lines are the limits: Max Position and Max Force from the machine configuration, and the sample profile's limits once one is selected for a run.
- Pause freezes the sweep so you can inspect a moment. The connection and recording are unaffected.
- Hover the chart for a vertical line and a tooltip with every series' value at that moment.
When you connect, the chart is filled with the machine's most recent readings rather than starting empty.
Stress–strain chart
Plots stress against strain only while a test is running, and clears at the start of each test. It needs the sample's width and thickness from the sample profile.
Controls and New test
Enable motion, home, zero and jog are covered in Manual control. The New test panel is covered in Running a test.