Run your first test
This assumes the machine is connected, on the recommended firmware, and calibrated.
1. Position the carriage
Open Control. This is where you watch the machine, move it by hand and start tests.
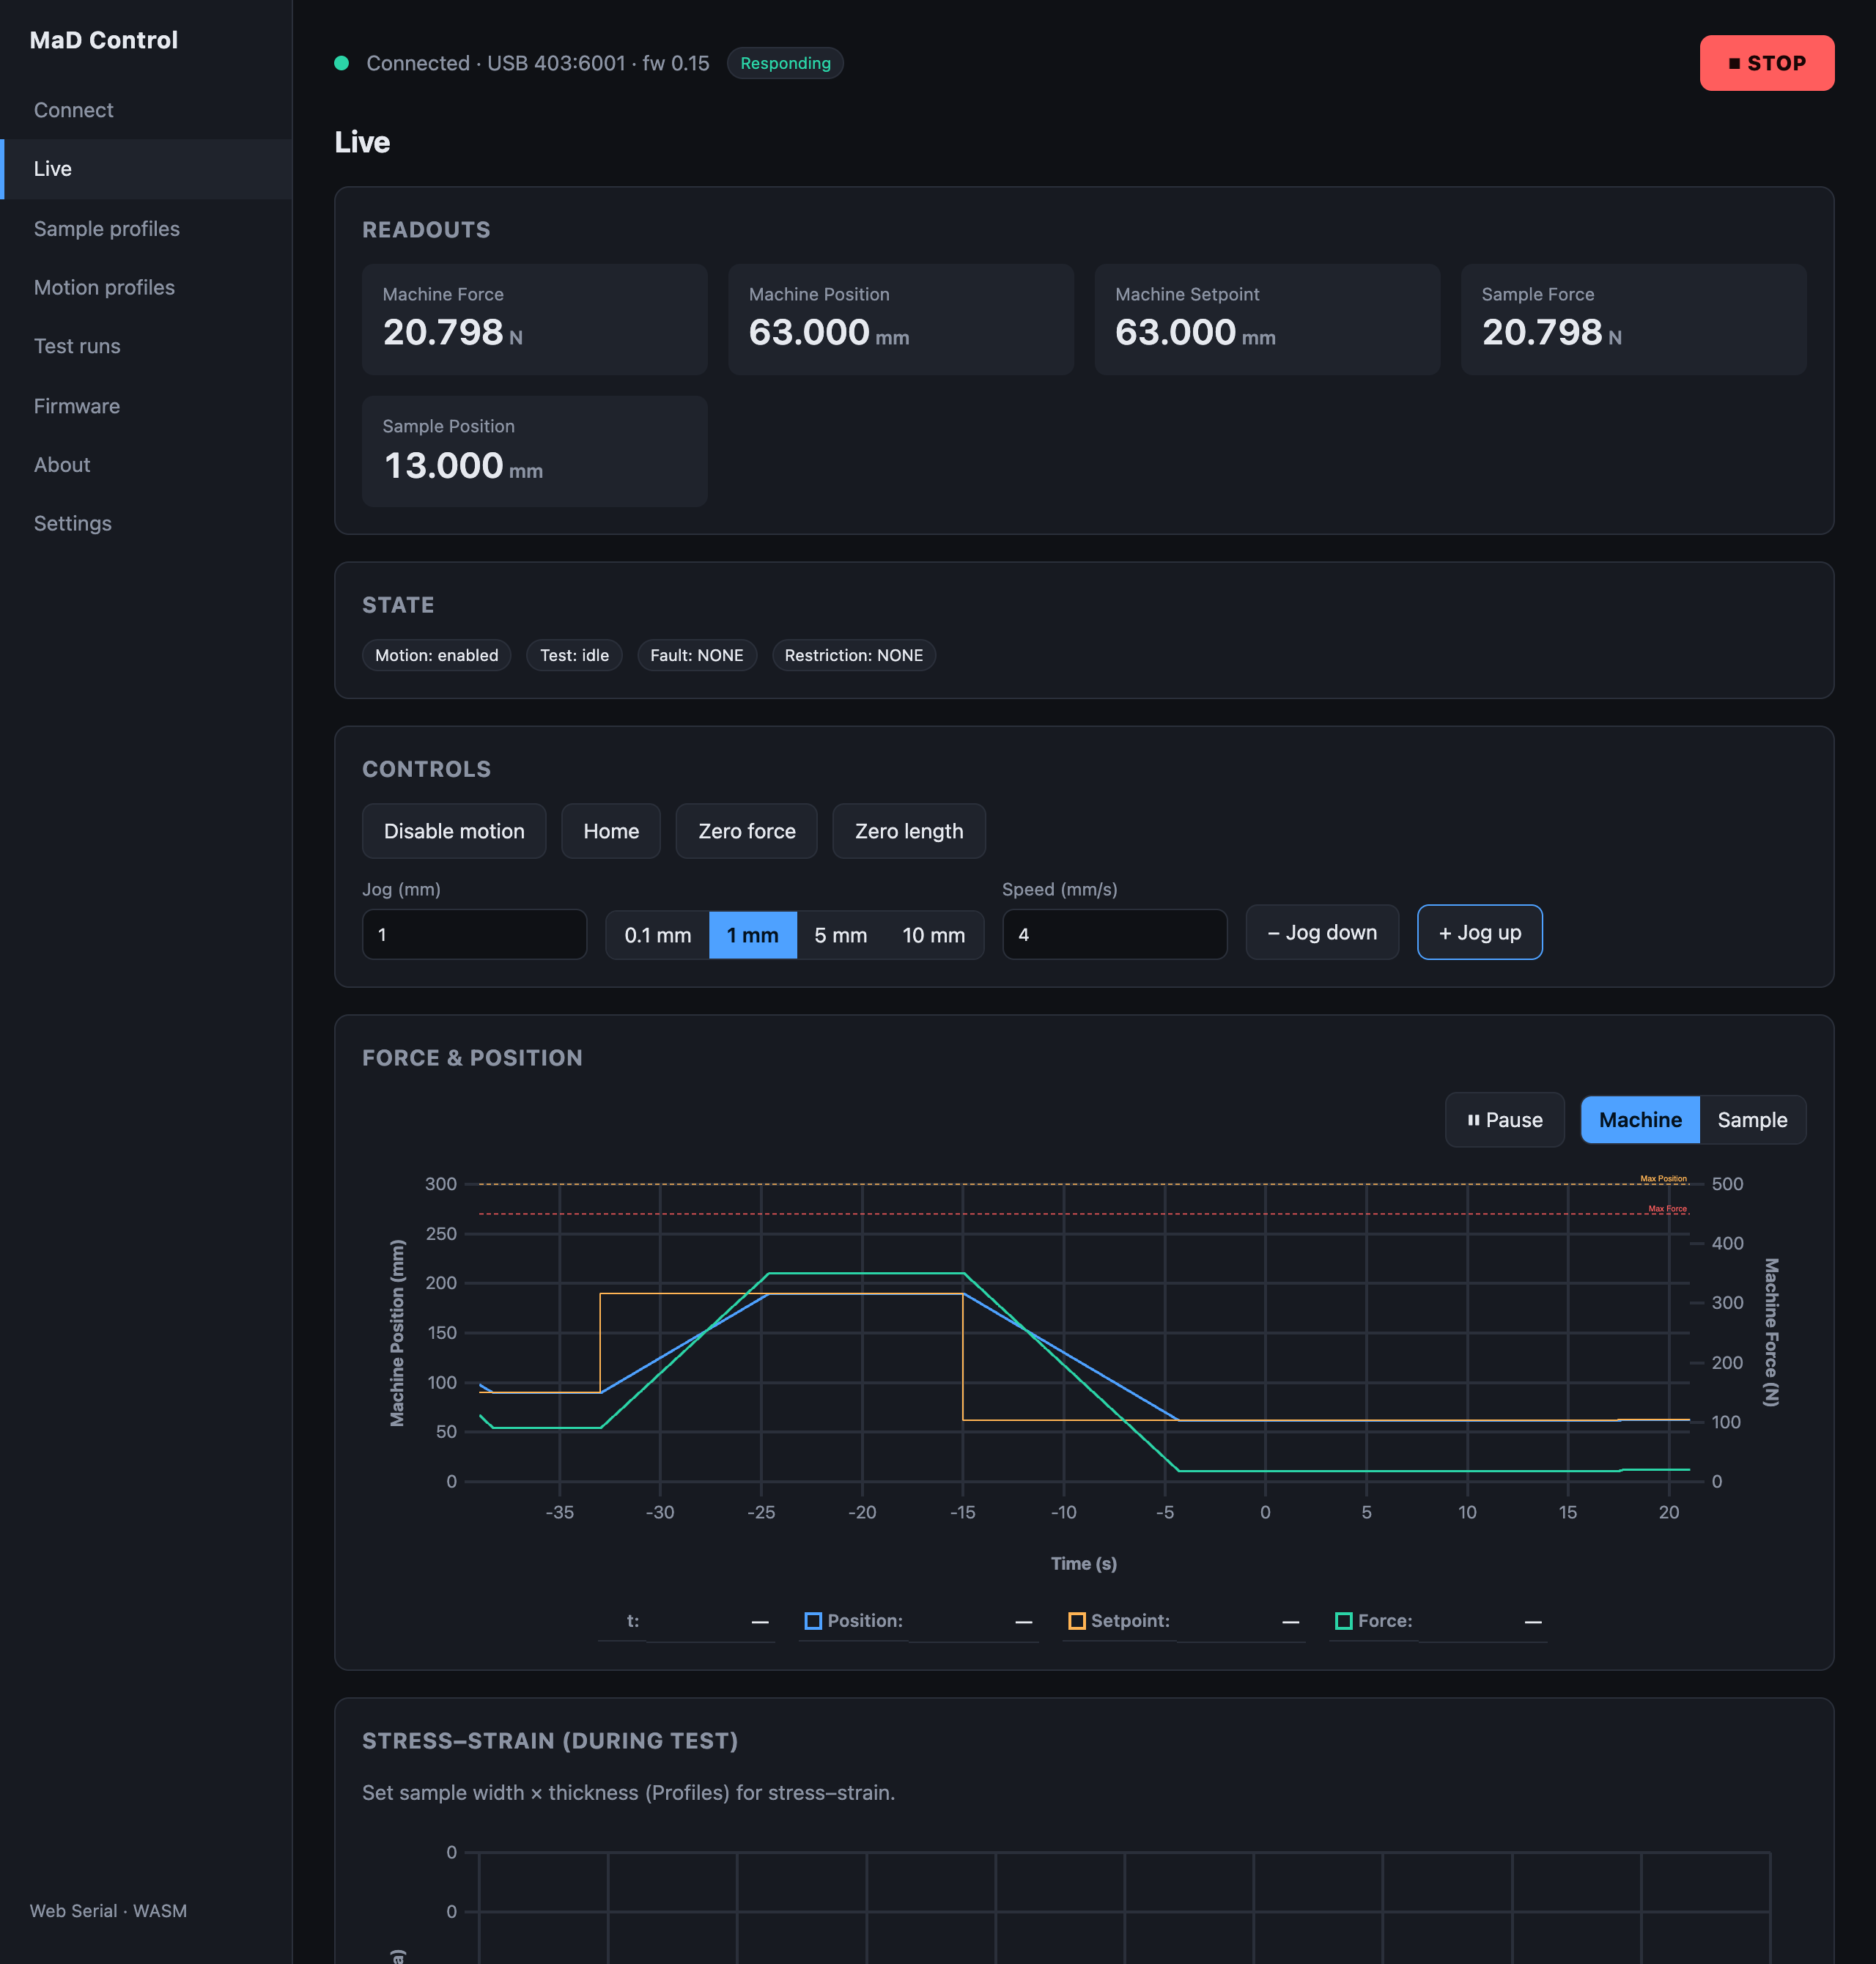
The coloured banner under State says what the machine is doing and what to do next.
- Click Enable motion. The banner turns green (Ready) and the Motion badge changes to enabled. Jog and Home stay locked until motion is on.
- Pick a jog distance (type it, or use the 0.1 / 1 / 5 / 10 mm presets), set Speed (mm/s), and use + Jog up / − Jog down to bring the grips to your sample's length.
- Mount the sample.
If the buttons are greyed out or a jog is refused, see The machine won't move.
2. Zero
With the sample mounted and just slack:
- Zero force makes the current load the origin of Sample Force.
- Zero length makes the current position the origin of Sample Position. This is the gauge length the test's strain is measured from.
Machine Force and Machine Position are unaffected: those are always absolute.
3. Create a sample profile
Open Sample profiles. A sample profile holds the specimen's dimensions and the limits the machine enforces during the test.
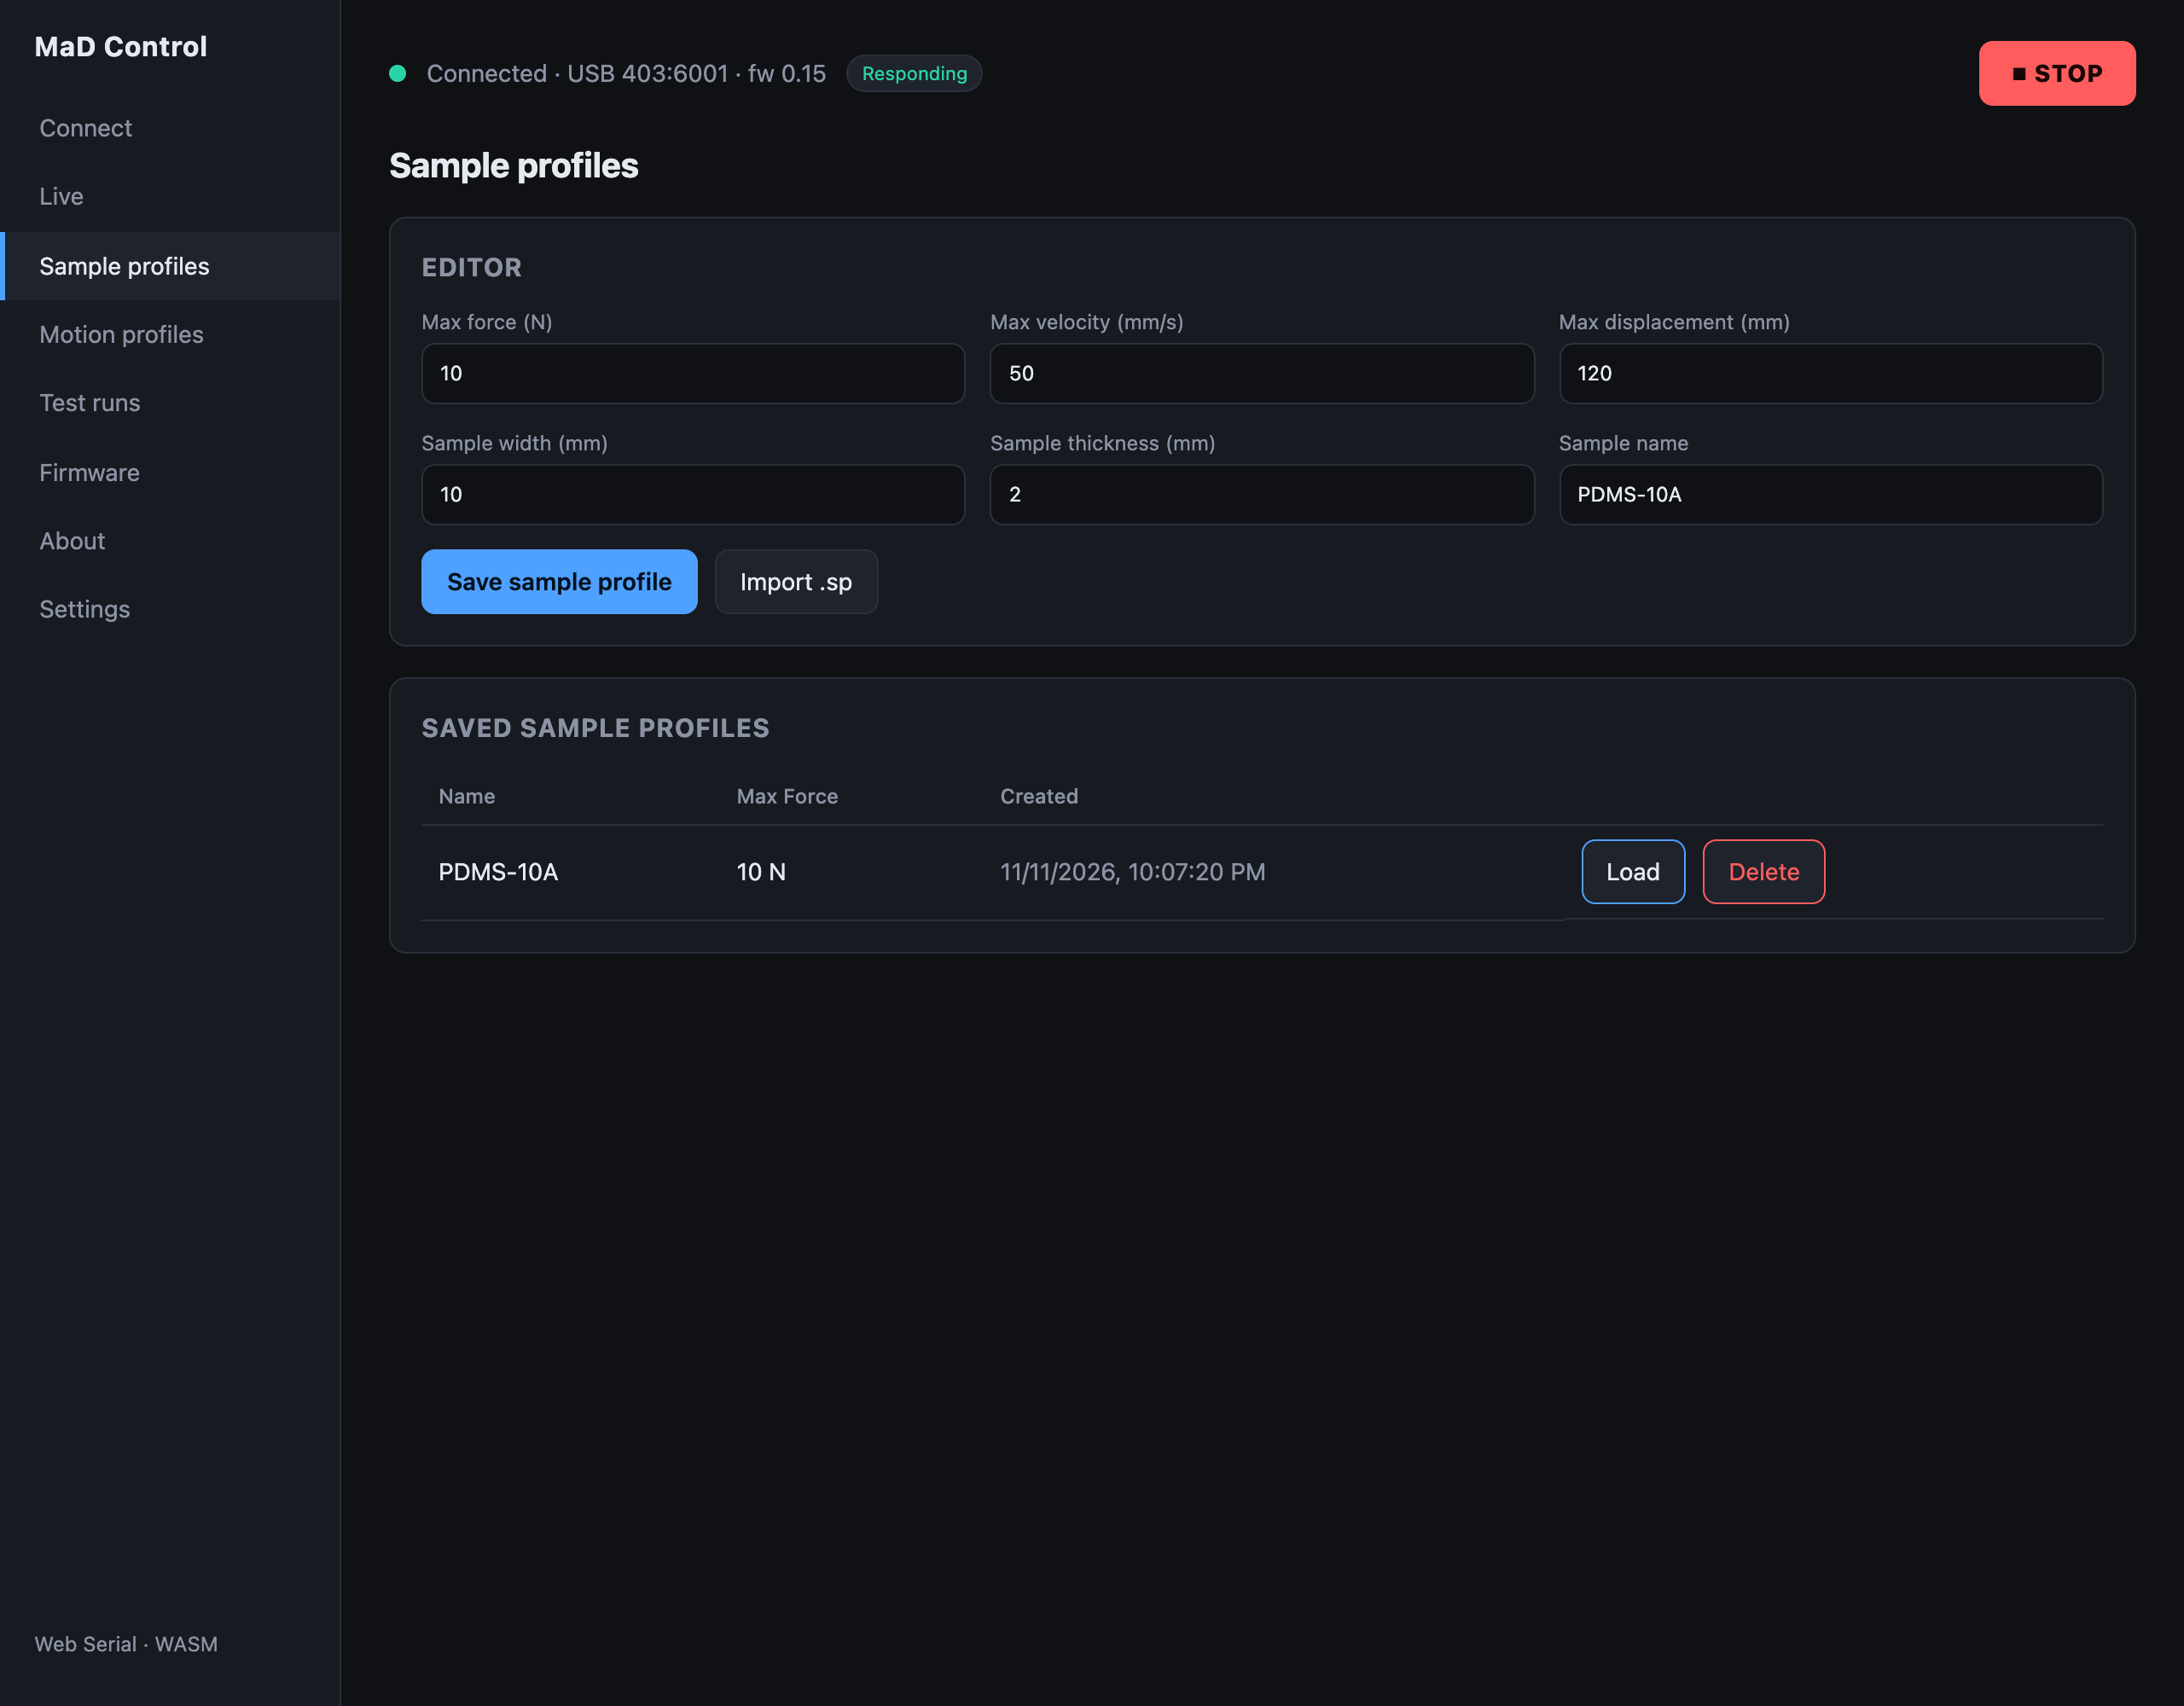
Enter the width and thickness (used for stress), and Max force / Max displacement. If the sample reaches either limit the machine stops the test. Save it.
4. Create a motion profile
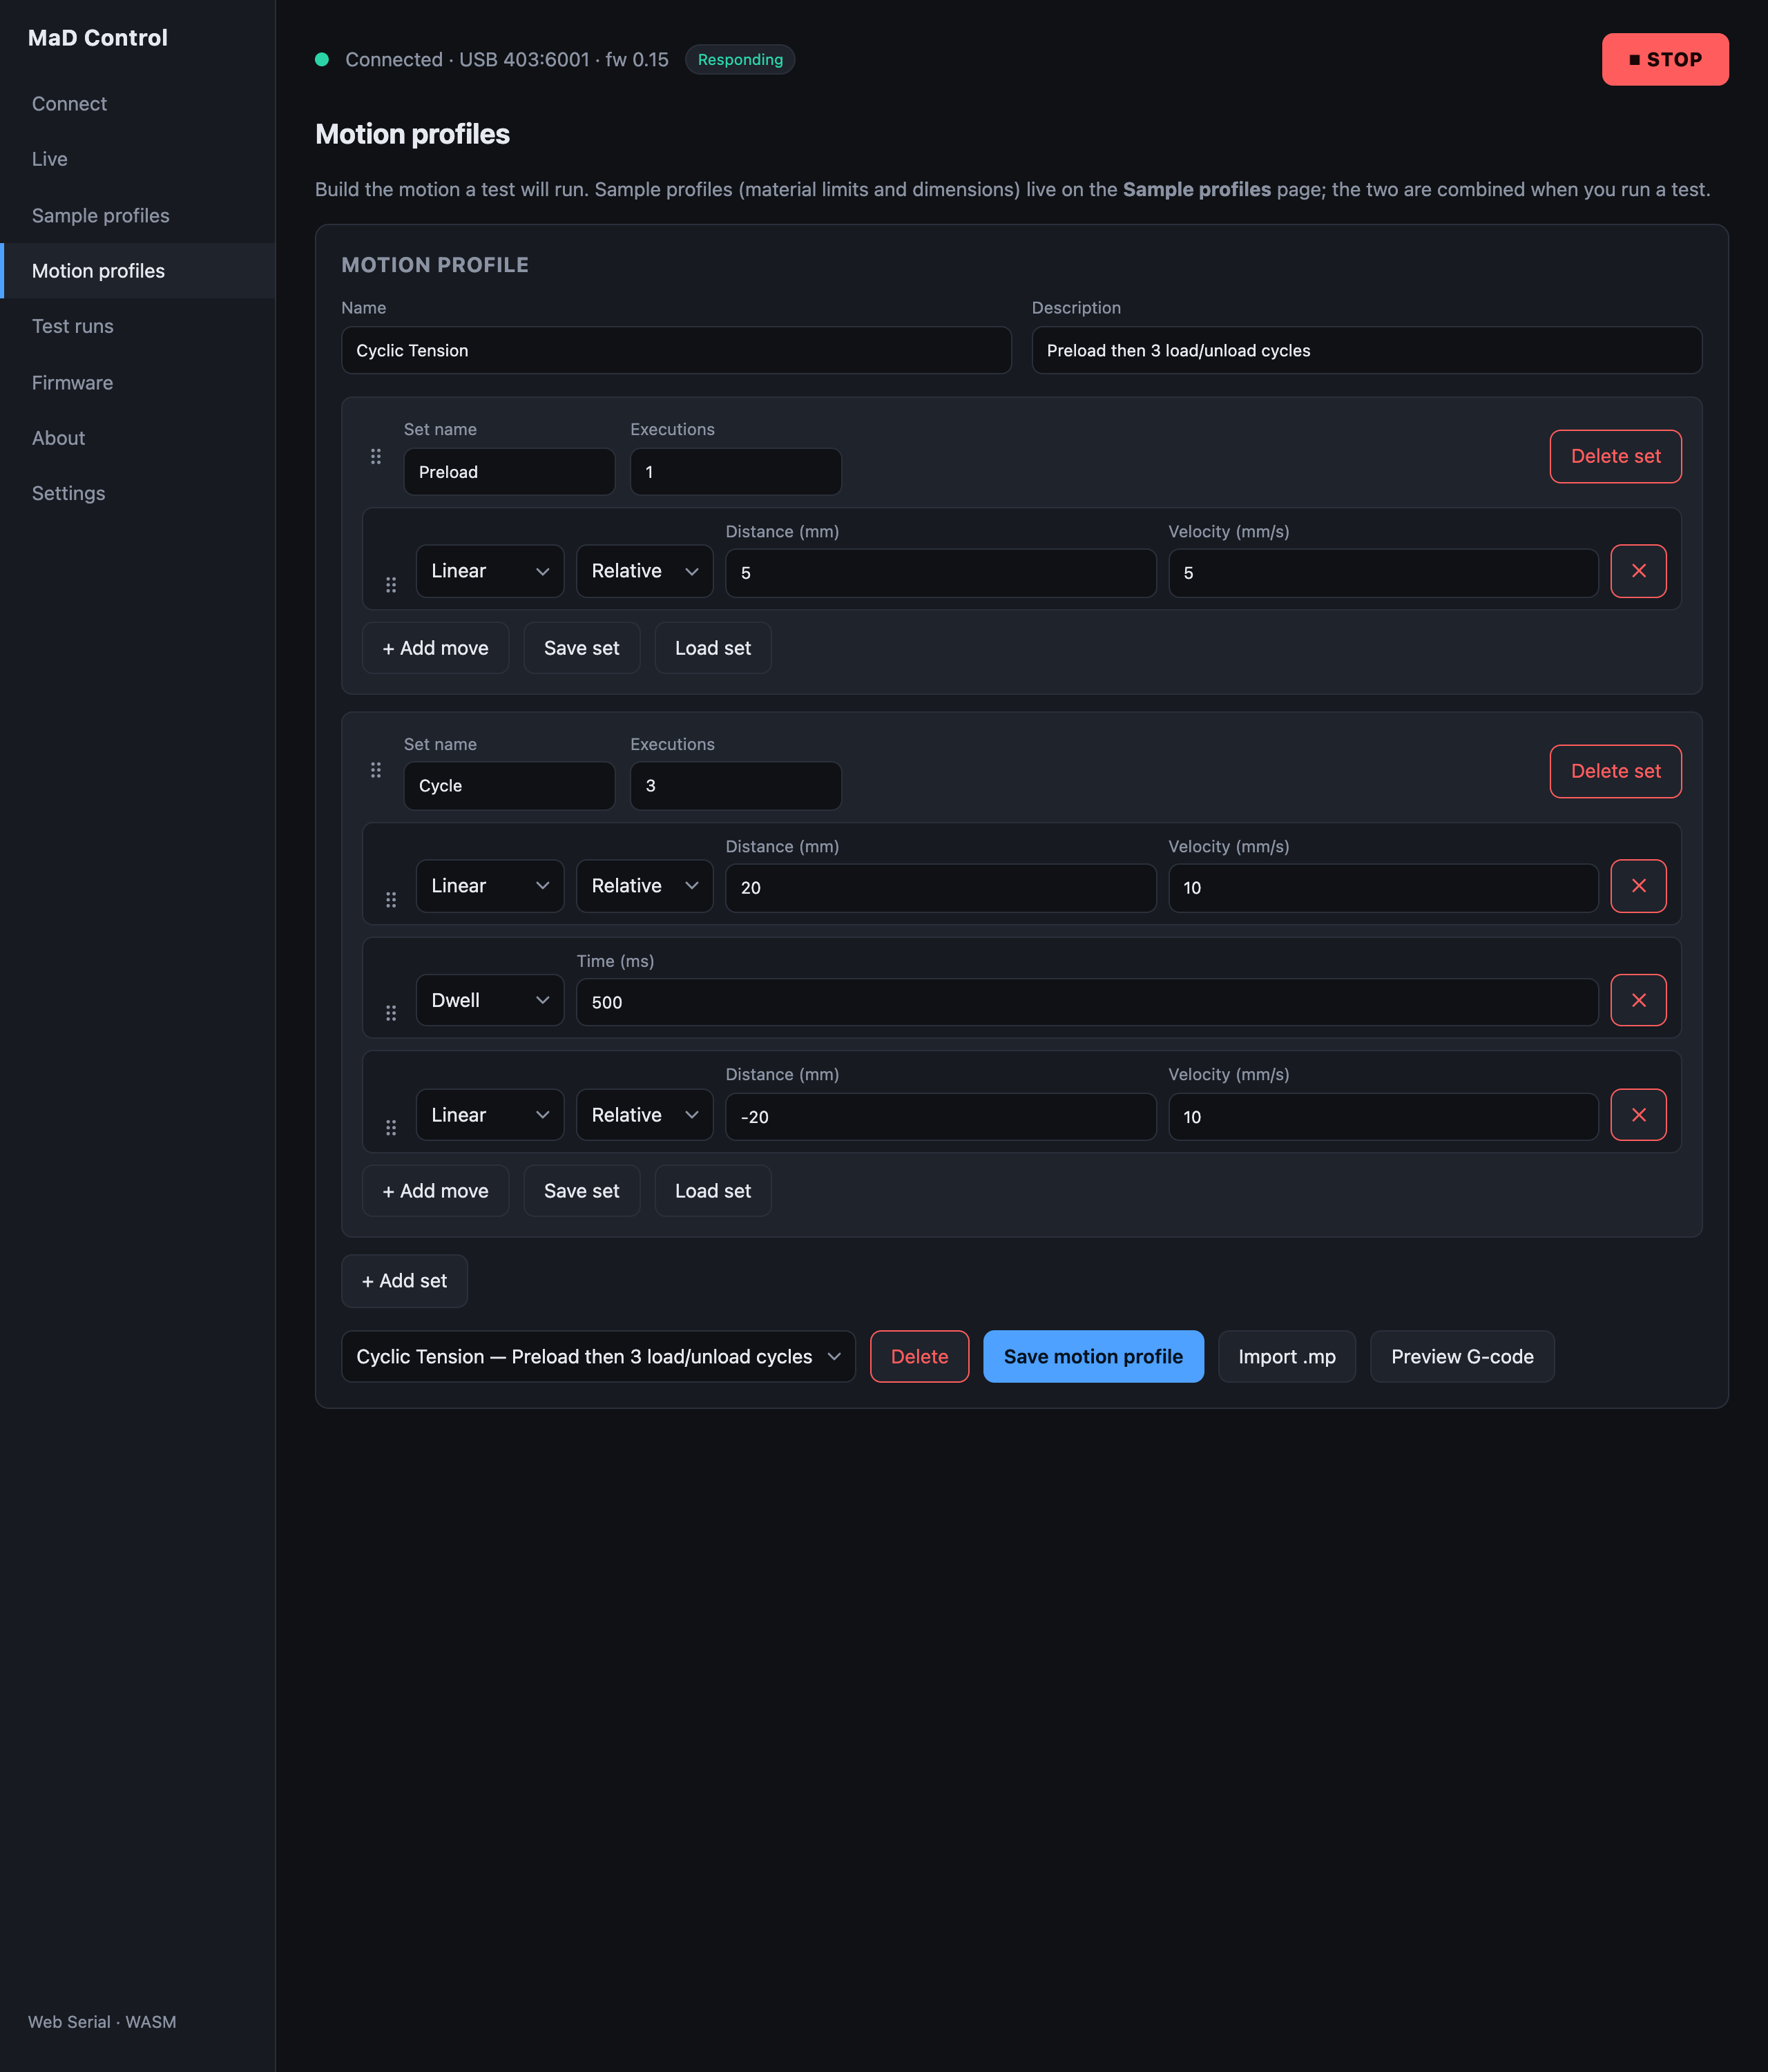
Open Motion profiles. A motion profile is what the machine does: moves (linear pulls, dwells, waveforms) grouped into sets that can repeat.
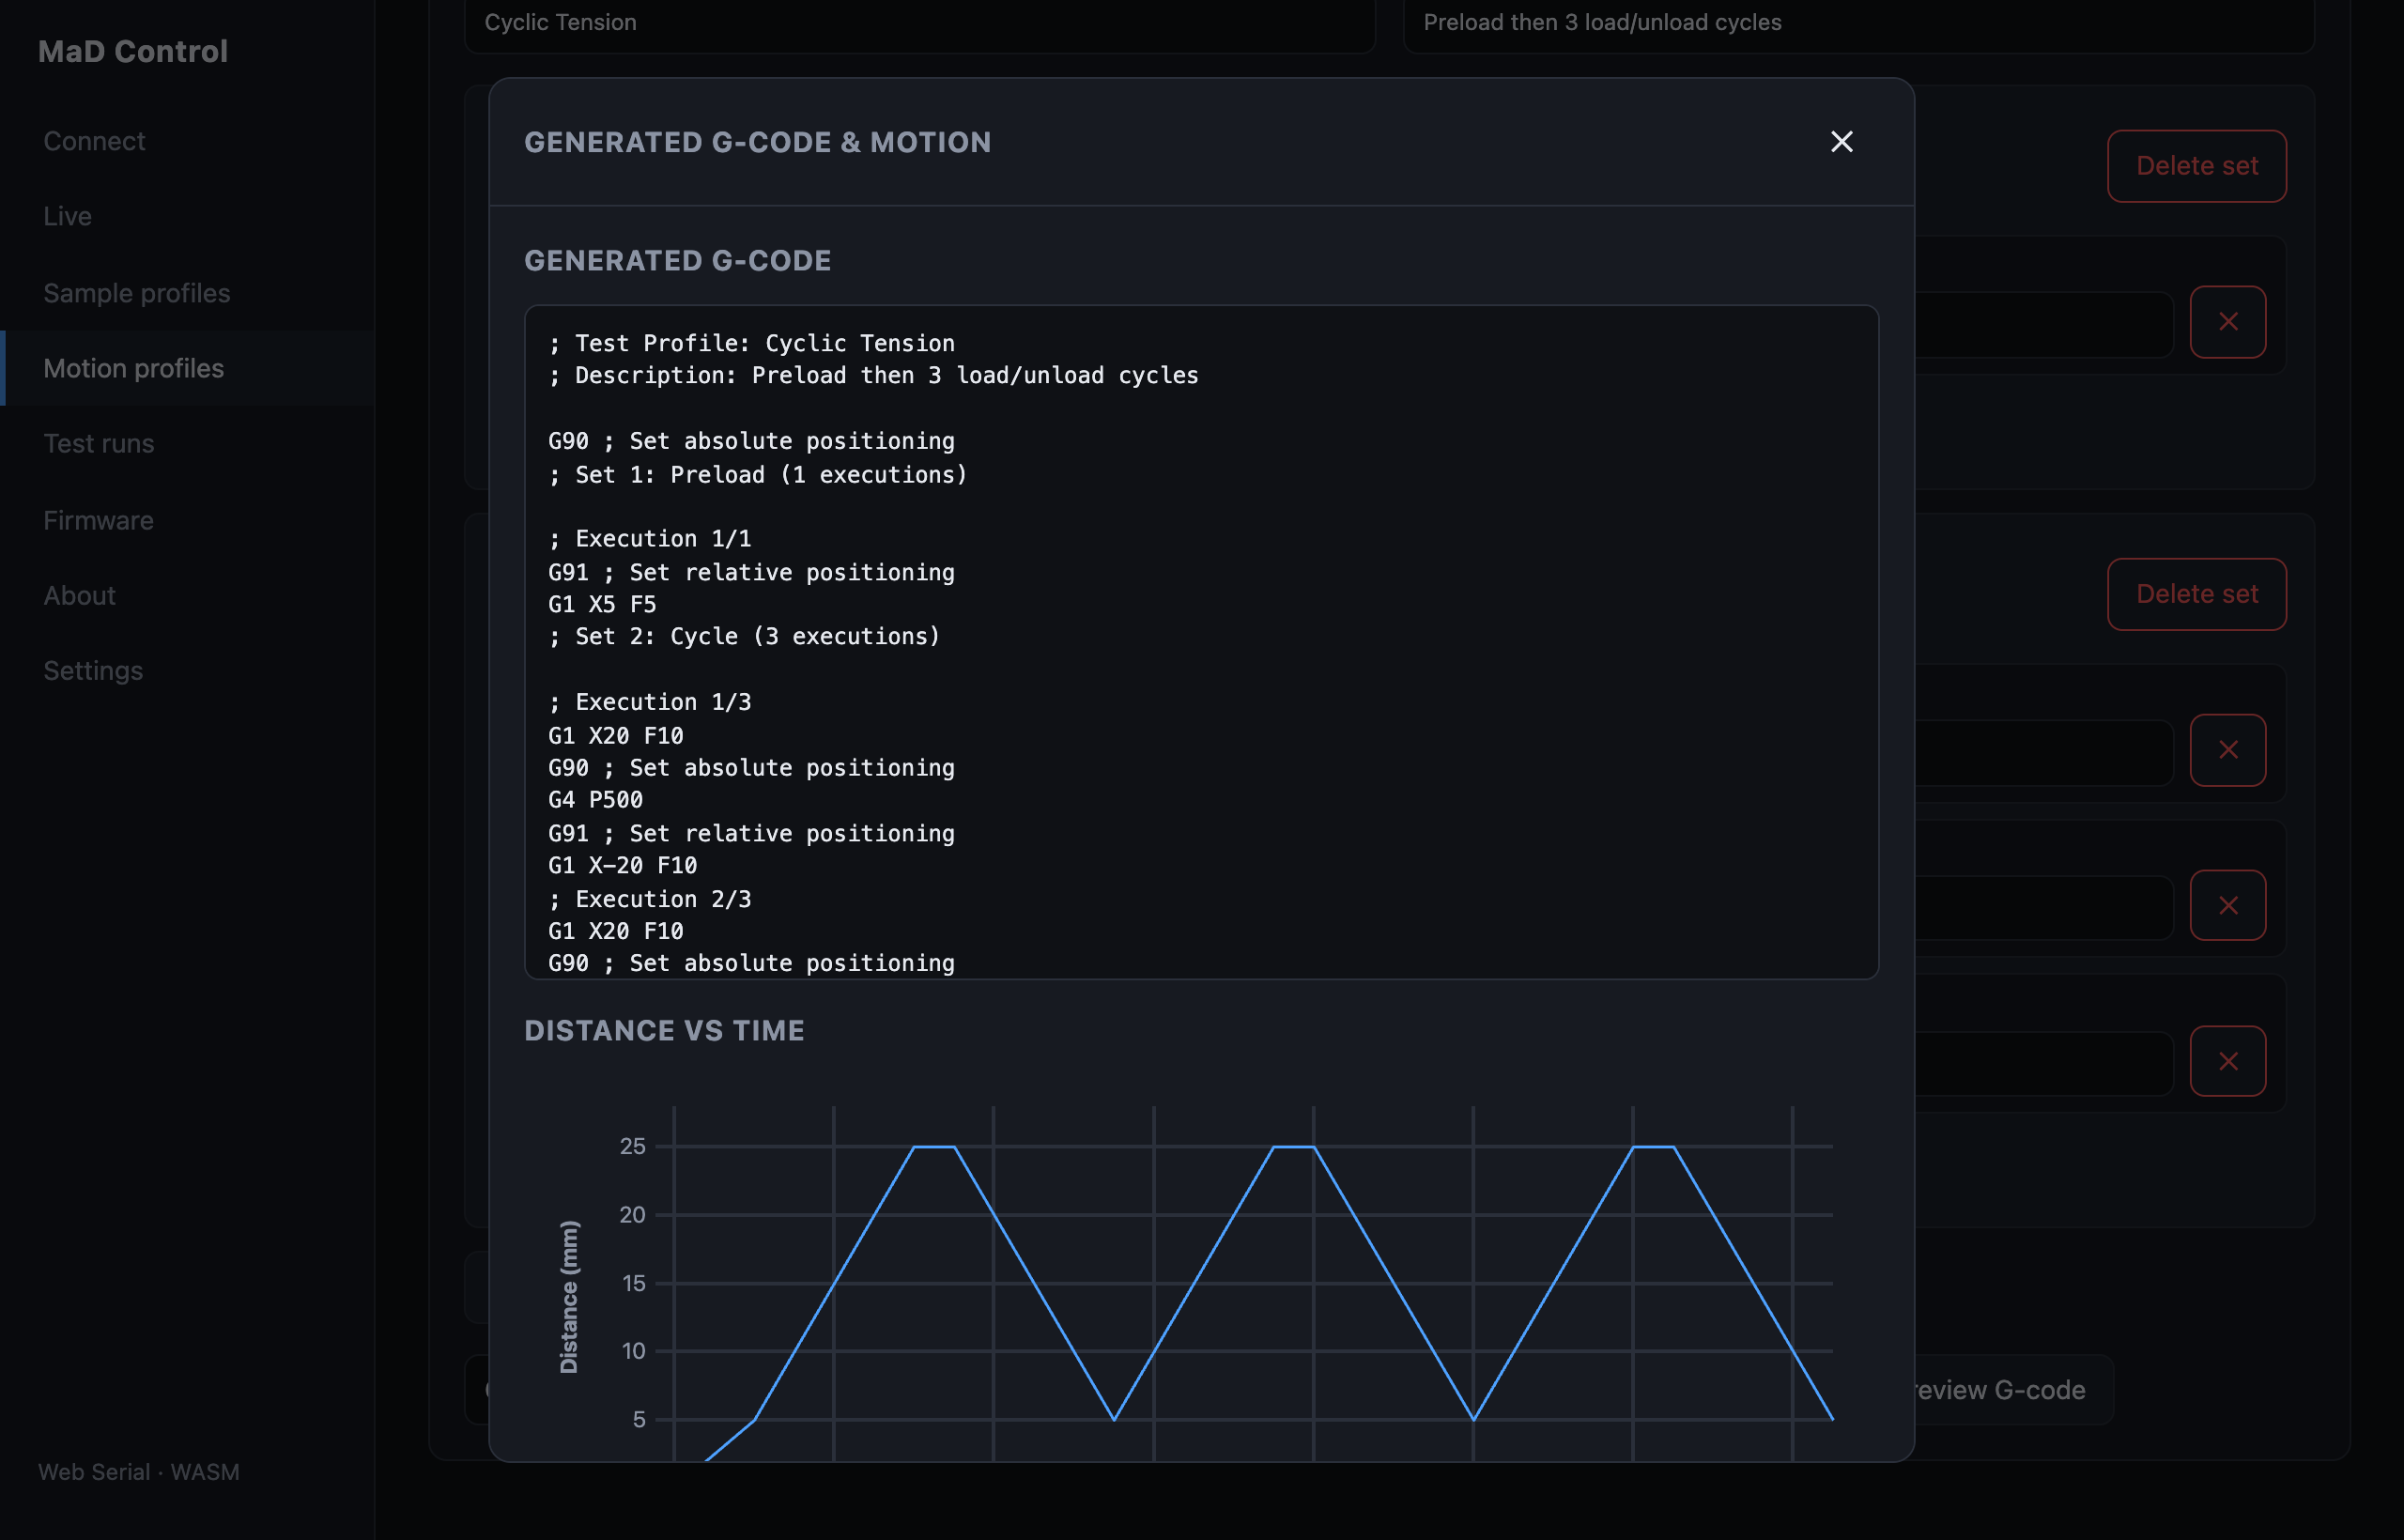
Preview G-code shows the exact program and its position-against-time plot before anything runs:
5. Run
Back on Control, in New test, pick the sample profile and the motion profile, then click Run test. If the test goes beyond the machine's or the sample's limits, the app lists each problem first: Cancel to fix the profiles, or Run anyway.

The app sends the limits, uploads the program to the machine's SD card and starts it. From then on the machine runs the test by itself. The banner reads Test running, the Test badge reads running, the manual controls lock, and the charts follow the test:
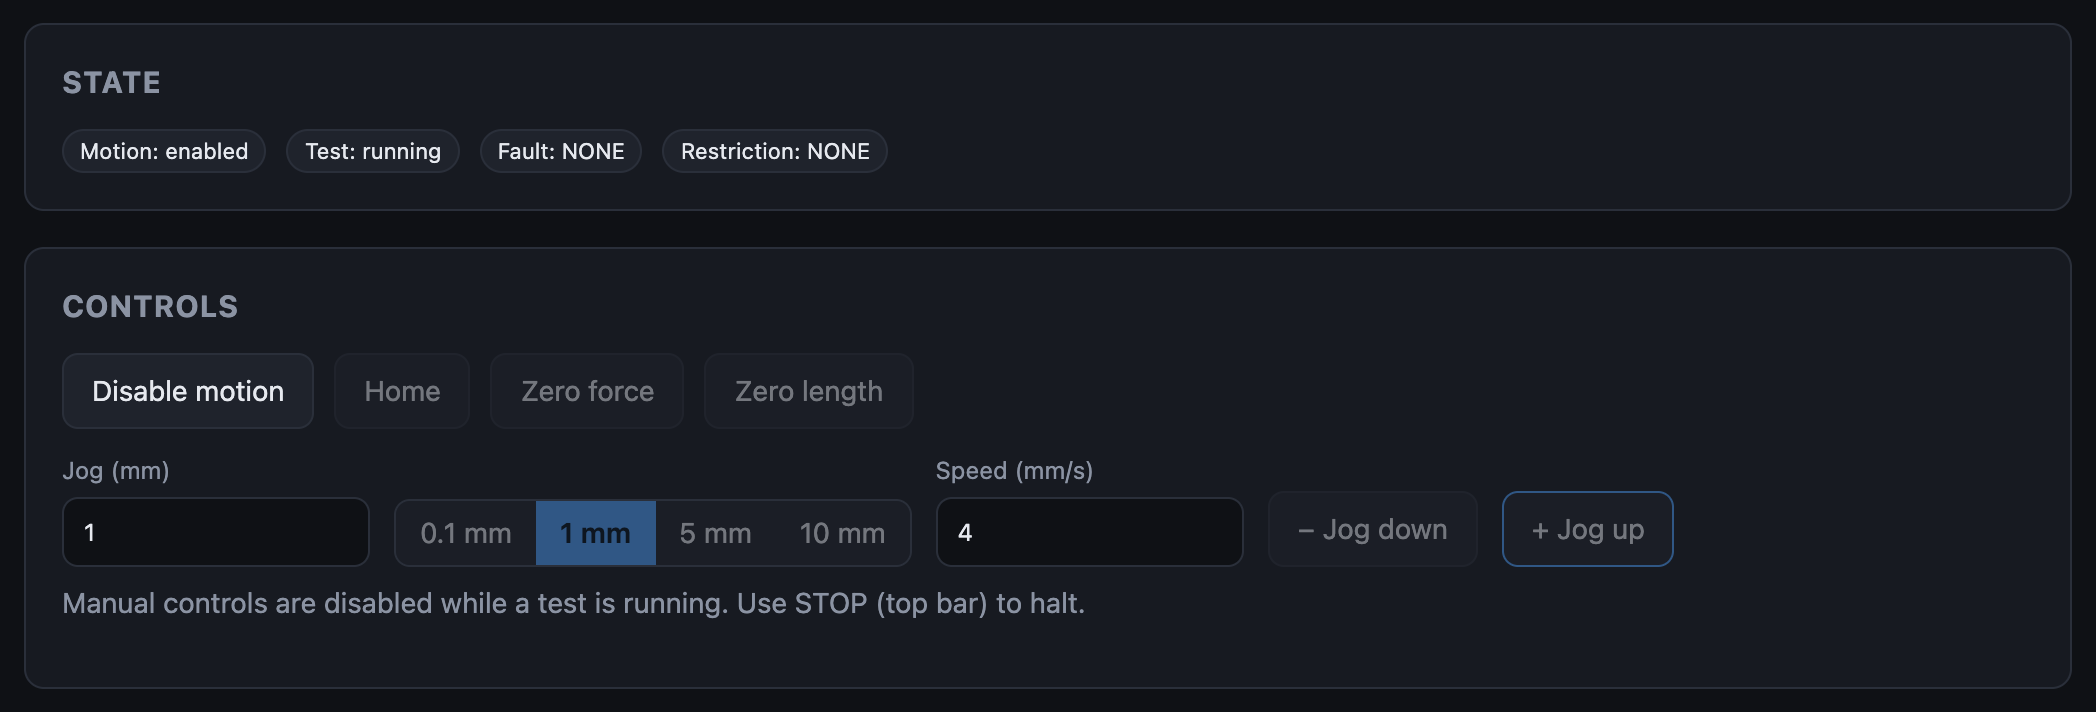
Stopping a test
The red STOP button disables motion, which ends the test. Closing the tab or unplugging USB does not stop it: the machine keeps running from its SD card and the app reconnects to watch. STOP is a software stop, not the hardware emergency stop.
6. Get the results
When the machine finishes, the run's status changes to completed, whichever screen you are on. Open Test runs, and in History click Download data to copy the recording off the machine, then View:
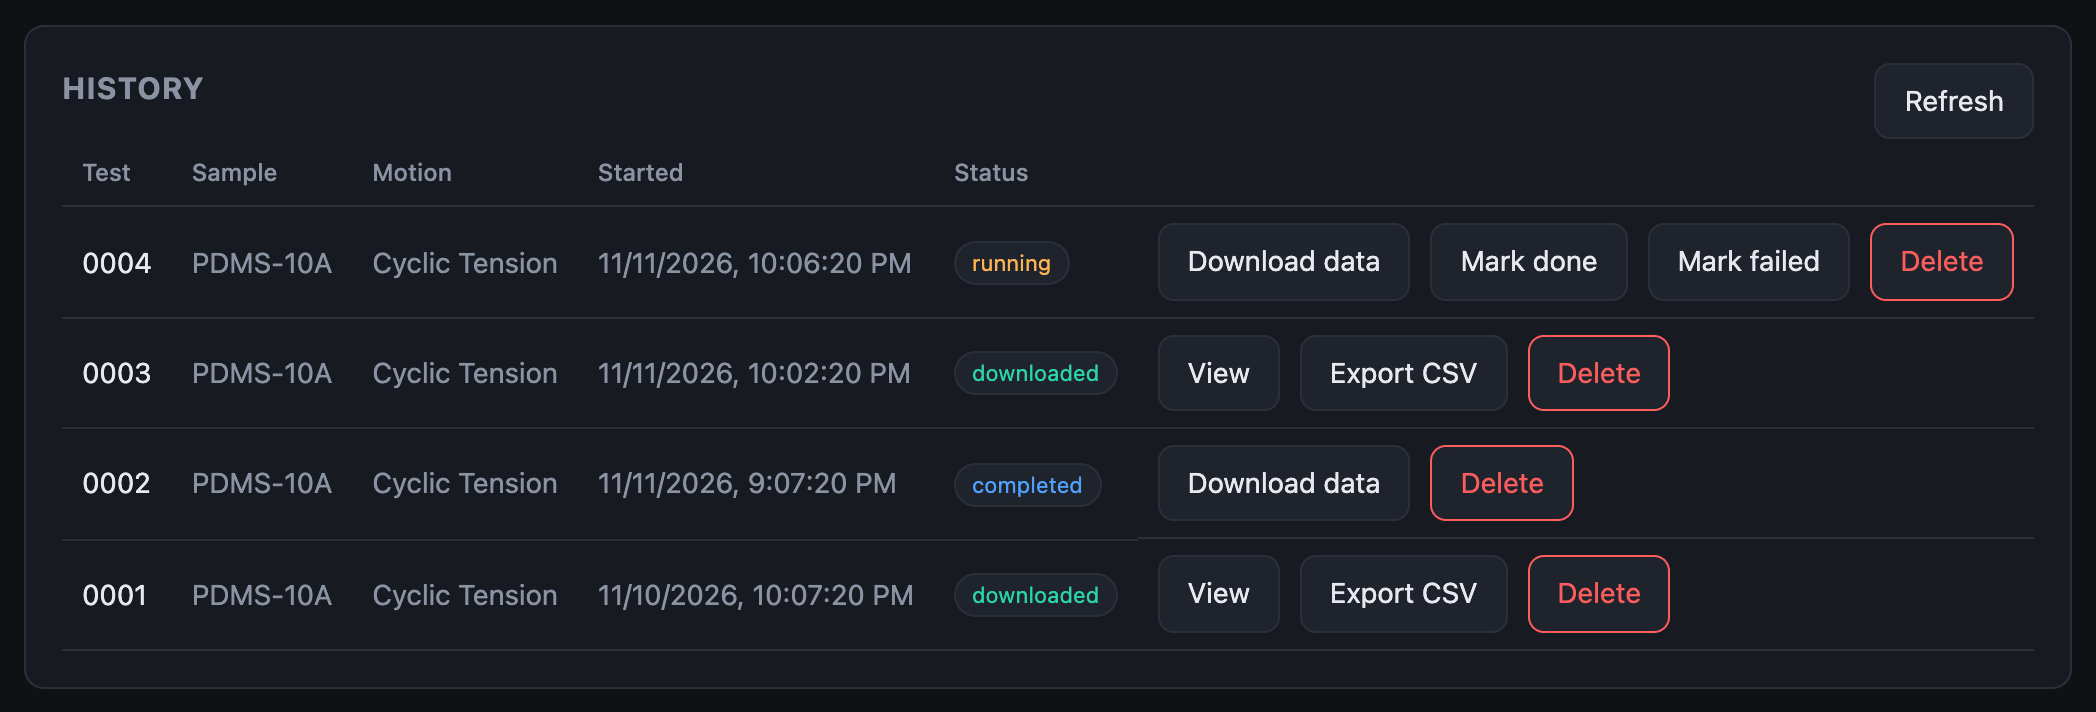
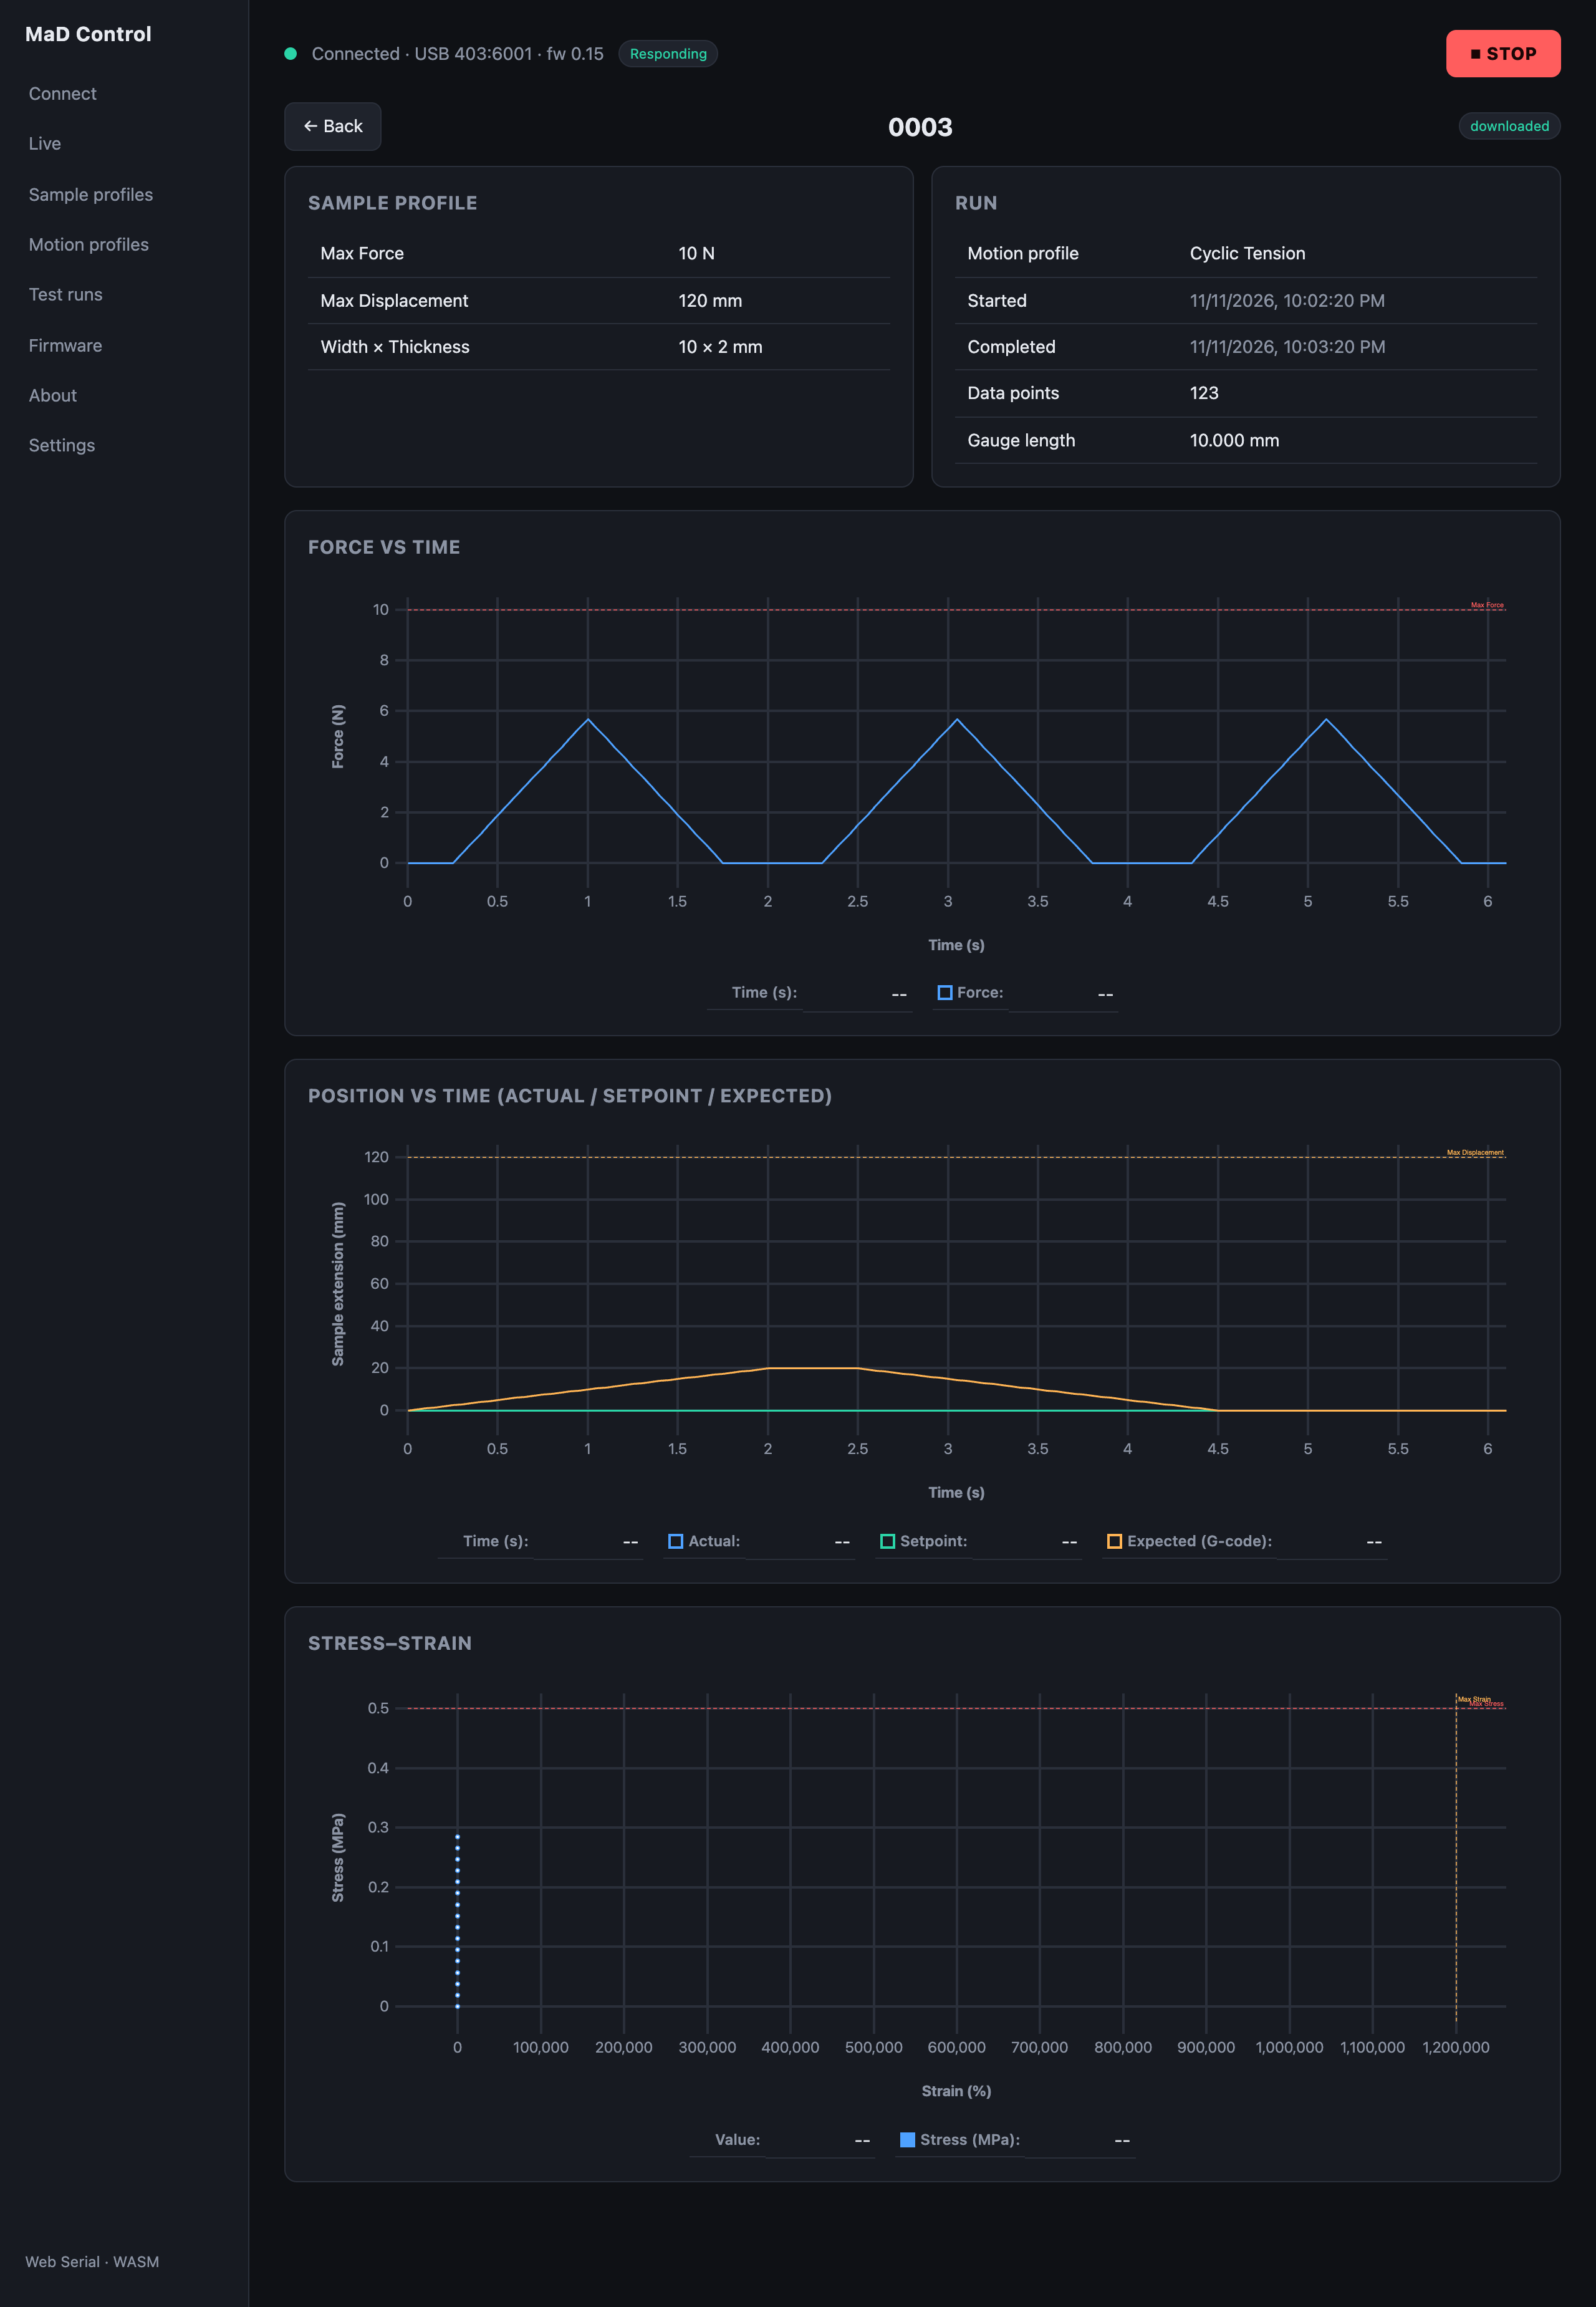
Export CSV saves the data for a spreadsheet or your own analysis.
Where next
- The User Guide covers every screen.
- Troubleshooting is organised by what you see on screen.
- Theory of operation explains what the machine is doing and why.